Nonfat Yoghurt
I learned how to make this from Melissa Clark's Creamy Homemade Yoghurt in the New York Times. Her recipe is for yoghurt made from any kind of milk. This is how I make it with nonfat milk so that it has zero Weight Watcher points. It's very good, I think. My recipe below makes a gallon (Charlie and I go through a lot of yoghurt fast) but you can scale down the recipe if you want less.With all the steps below, it looks complicated and time-consuming but it really isn't. It is fun to make and costs significantly less than store-bought yoghurt.
Servings 16 one-cup servings
Equipment
- 1 large clean heavy pot (my pot is stainless steel) (See notes below* for how to do it in an InstantPot instead of in a pan on the stove top.)
- 1 gallon-size insulated vacuum "thermos" bottle (I use this one.) (See notes below** for alternative to using thermos-type bottle.)
- 1 thermometer (something like this one)
- 1 large spoon for stirring
- 1 pint jar with lid
- 4 quart-size jars or 8 pint-size jars or other containers to hold the finished yoghurt
Ingredients
- 1 gallon nonfat milk
- 1 cup nonfat dry milk (instant)
- 1/2 cup yoghurt that has live and active cultures (this is what I'll call the yoghurt starter below)
Instructions
General Notes
- A good time to start is in the morning because the yoghurt needs to incubate 12 hours or so and then be refrigerated. You'll want to have it in the refrigerator before bedtime! Or you can start late in the day and incubate overnight if you can time it right.
- Heating is all done on low heat settings. You must heat the milk slowly so it doesn't scorch. (I learned this the hard way and had to throw out a batch.)
- I do this at mile-high altitude on an induction stovetop. Times may vary under different circumstances. But temperature targets should be the same.
- Read ahead of all instructions below because there are things to do while the milk is heating and cooling.
Steps
- Put the milk into the pot. Put pot on a stove burner and set heat to 3, 4, or 5 (on a scale of 1 to 10). Stir frequently. The higher you have the heat, the more frequently you need to stir. You don't want it to scorch! Turn heat down if it's heating too fast. As you stir, you will probably feel the milk starting to stick slightly to the bottom of the pan. This is not a problem as long as it doesn't scorch badly. Just brush over the crust on the bottom lightly. Don't scrape it up as you stir. (See notes below* about how to heat in an InstantPot.)
- Heat until temperature reaches 181 degrees or so. (Just be sure it gets over 180.) This takes me 30 to 40 more minutes. Stir frequently and test temperature frequently. To test temperature, hold thermometer tip deeply in the middle but don't touch the bottom.
- Near the end of the above step, stir in the dry milk powder. I do this when the milk is 170 degrees or so.
- While the milk is heating, fill the thermos with boiling water to get the thermos good and hot.
- While the milk is heating, very close to the end, fill your sink with a few inches of ice water. You'll use this to speed up the cool-down process described below.
- When the milk gets to above 180 degrees, keep heating for another minute or two and then remove from heat. Set the pot into the ice water.
- Cool the milk to 120 degrees. Stir frequently and test temperature frequently. This takes me 5 or 6 minutes.
- While the milk is cooling, put the yoghurt starter into the pint jar.
- When the milk cools to exactly 120, immediately remove the pot from the ice water and very quickly dip out about a cup of the warm milk and add it to the yoghurt in the pint jar. Put on the lid and shake well to mix thoroughly. Work quickly so the main pot of milk doesn't cool much more. (Don't do this before milk cools down to near 120 because if milk is too hot it will kill the yoghurt cultures.)
- Quickly but thoroughly stir the yoghurt starter/milk mixture into the pot with the rest of the milk.
- Discard the hot water that is in the thermos.
- Pour the warm milk into the warm thermos and put lid on thermos.
- If you worry about your thermos not holding heat well or the room is cold, put the thermos in a box and wrap it in a blanket. Be careful. If you use the thermos I bought, it leaks around the top. You have to keep it upright.
- Leave for 11 or 14 hours to incubate/ferment. Can be as little as 6 hours, per Melissa Clark, but the longer it sits, the thicker and tangier it will be. I do the full 12 hours and often 14 hours.
- Spoon the yoghurt out of the thermos and into the containers you want to store the yoghurt in. Put into the refrigerator to chill thoroughly. The yoghurt will continue to thicken as it chills. You can probably cool it in the thermos container if you wish but be sure to first replace the lid with something that doesn't insulate.
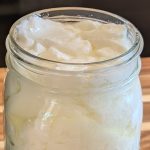
- You might notice some thin clearish liquid separating from the thickened yoghurt. This is called whey. It is to be expected. You can put a little of the whey into each yoghurt container. Or you can drain it off and save it to add to recipes if you wish. It tastes good and is nutritious. You can even strain off more whey on purpose and make Greek yoghurt if you wish. There is plenty of info on the web about how to do this.
- Important: Save 1/2 cup of your finished yoghurt to use as a starter for your next batch.
Notes
*You can also use an InstantPot to heat the milk. When I use my InstantPot, I set it on Soup/Medium Heat. Leave it uncovered. I stir every minute or two and check temperature frequently. Do NOT put the lid on; do NOT pressure cook. Remove from the InstantPot when it's been 180 or above for a minute or two. All other steps above are the same.
We've lately been making two gallons at a time and I have one gallon heating on the stove and one in the InstantPot.
**If you don't have a thermos or don't want to buy one to incubate the yoghurt, you can put the warm milk into jars and place the jars in a box and wrap everything with a warm electric throw or electric blanket. Of course, keep the throw or blanket turned on for the full time it is incubating. One advantage of this method is that, at the end, the yoghurt is already in the jars it will be stored in.
In the winter, I put my thermos bottle, or the above set up, in front of a heater vent. But I'm not sure that this is necessary.